Thursday, 12 May 2016

Final Project complete bibliography

Ashley Lyndhurst. (2013). 3ds Max 2014 - Clothing YOUR characters (BASICS) - "The naked truth...". Available: https://www.youtube.com/watch?v=i0f7OKD_8OQ. Last accessed 15th Feb 2016.

Farid. (2007). "Yes, but how many polygons?" An artist blog entry with interesting numbers. Available: https://forum.beyond3d.com/threads/yes-but-how-many-polygons-an-artist-blog-entry-with-interesting-numbers.39321/. Last accessed 13th Oct 2015.

Antony Ward. (2011). How to create character models for games: 18 top tips. Available: http://www.creativebloq.com/how-create-character-models-games-18-top-tips-9113050. Last accessed 13th Oct 2015.

Jason. (2013). Tips & Tricks related to Facial Modeling for Animated Productions. Available: http://www.cgmeetup.net/home/tips-tricks-related-facial-modeling-animated-productions/. Last accessed 13th Oct 2015.

Various. (2010-2015). FaceTopology. Available: http://wiki.polycount.com/wiki/FaceTopology. Last accessed 20 Oct 2015.

Del. (2011). Face Topology [Breakdown Guide]. Available: http://polycount.com/discussion/80005/face-topology-breakdown-guide. Last accessed 20 Oct 2015.

Christopher Albeluhn. (Unknown). Normal Map Tutorial. Available: http://www.chrisalbeluhn.com/Normal_Map_Tutorial.html. Last accessed 8th March 2016.

Edge-CGI 3D. (2014). Zbrush for Beginners Tutorial - Essentials to get Started with Sculpting HD. Available: https://www.youtube.com/watch?v=PO--0h8XHiw. Last accessed 1st Dec 2015.

Serhat YĆ¼cekaya. (2013). ZBrush 4R6 New Feature: ZRemesh ( No More Retepology ). Available: https://www.youtube.com/watch?v=4xiCSw7LXew. Last accessed 1st March 2016.

Faolinfalalay. (2014). Creating Clothes & Armor With Panel Loops in Zbrush. Available: https://www.youtube.com/watch?v=hGqMYhueyLc. Last accessed 18th Feb 2016.

Liam Shaw. (2012). Zbrush Tutorial - Answering TrickiiT - How to sculpt detailed muscles [pretty quick and dirty tut]. Available: https://www.youtube.com/watch?v=DyoMb83kI2Y. Last accessed 28th Dec 2015.

ZBDRipley. (2012). Quick Tips: Sculpting the mouth. Available: https://www.youtube.com/watch?v=nsHdcprF-gY. Last accessed 17th Jan 2016.

Aleksey Bogatyrev. (2013). ear sculpt realtime. Available: https://www.youtube.com/watch?v=gyqkDJhZuKA. Last accessed 17th Jan 2016.

Scott Spencer (2010). Zbrush Digital Sculpting, Human Anatomy. Canada: Wiley Publishing Inc

ROOKEXE. (2013). Character Modelling Pipeline research. Available: http://polycount.com/discussion/115231/character-modelling-pipeline-research. Last accessed 14th Feb 2016.

Man Child. (2015). Generate Normal Map in 3ds Max Fast!!!. Available: https://www.youtube.com/watch?v=pGHirP8WE-I. Last accessed 18th Mar 2016.

Korosh Ghanbarzadeh. (2010). Perfect UVs by Pelt Mapping in 3ds Max.Available: http://www.3dtotal.com/tutorial/124-perfect-uvs-by-pelt-mapping-in-3ds-max-korosh-ghanbarzadeh-uv-face. Last accessed 18th Mar 2016.

CGDreamsTutorials. (2014). Making a eye texture in Photoshop.Available: https://www.youtube.com/watch?v=orXGn6SfoNY. Last accessed 3rd April 2016.

David Vercher. (2016). Modeling & Texturing Head Tutorials (Autodesk Maya & Mudbox). Available: https://www.artstation.com/artwork/XGwQa. Last accessed 9th Apr 2016.

Giancarlo Arriola 3D Game Artist. (2012). Basic Retopology in Zbrush.Available: https://www.youtube.com/watch?v=j-zMGK4qj9s. Last accessed 2nd Mar 2016.

North Pixel. (2012). Pelt Unwraping a Face in 3Ds Max. Available: https://www.youtube.com/watch?v=3w-kEukP6wI. Last accessed 18th Mar 2016.

3dmotive. (2012). Rendering Ambient Occlusion with Mental Ray in 3ds Max - 3dmotive. Available: https://www.youtube.com/watch?v=xYBBt1utWb0. Last accessed 23rd Apr 2016.

Brian T. (2005). Best way to mirror a UV Map for symmetry. Available: http://blenderartists.org/forum/showthread.php?35959-Best-way-to-mirror-a-UV-Map-for-symmetry. Last accessed 8th May 2016.

Release2. (2008). Symmetrical character UVW unwrapping. Available: http://www.maxforums.org/threads/symmetrical_character_uvw_unwrapping/0001.aspx. Last accessed 8th May 2016.

Wednesday, 11 May 2016

Final Project Post Mortem

Overview of project

The original concept to undertake in this project was to create a 3D character, texture, rig and animate it to a professional standard, after a matter of weeks researching into how much work would be needed to complete this and having meetings with my tutors I decided to change my final project into something more manageable but just as challenging.

The new concept to undertake in this project was to create a 3D character model that would be created and textured as if it would be used for animation, while following the theme of the uncharted games, this boiled down to theme, assets, texture resolution and poly count.

I began the first half of this project solely focusing on male anatomy, poly counts of 3D characters and topology for animation. All of this boiled down to help me begin to create my own 3D character. I began with designing my character, focusing heavily on the main protagonist of the Uncharted series, Nathan Drake.

Leading up to the Christmas break I was able to do my research in male anatomy and topology for animation and I got a start modelling my character in 3DS Max, I wanted to create a base mesh in Max and export it into Zbrush so that I didn't have the challenge of trying to create a human form from scratch in a program I did not yet know how to use.

Following my project time line I managed to get my base model completed before the seminar presentation, this allowed me to show where I was in the project and where I was heading next, the feedback I received was that I may be going off track because my model was not looking how I set up in my project proposal, I was also told that I could have been further down the 3D artists pipeline had I followed it correctly, this is where I feel I could have saved a lot of time if I did the relevant research and stayed to it. Upon researching the pipeline I discovered a much more efficient method of creating my model, as my model was not going to have removable clothes the mesh underneath was not needed, which meant that all the work I had done beforehand was irrelevant. However due to me keeping with my time line I was at the exact point in which my model was meant to be finished, meaning that I did not lose any time to work on the next part of the project.

I didn't really encounter any hardships during the clothes sculpting, but I did learn a great deal about the software I was using, i discovered various tools that made creating clothes extremely simple in Zbrush, this helped a lot to boost myself forward in my time line which gave me extra time to work on re-topology.

Most of my most serious issues that I encountered came from UV unwrapping and texturing, these came in the form of, visible seams, broken textures and when exporting it to unity, a shiny model, all these issues were fixed with the help of the 3DS Max forums, experimentation and other websites with useful information detailing to 3D modelling.

What went well

  • I have completed what I set out to do, create a 3D character model following the theme of Uncharted, fully textured.
  • I have learnt new and more efficient methods of using 3DS Max.
  • I have learnt the fundamentals and some advanced techniques of Zbrush in a short amount of time.
  • I have learnt new UV unwrapping techniques.
  • I have learnt how to create a texture for a face from a photograph.
  • All problems encountered were fixable and did not halt progress on the final product for too long.

What could have went better

  • Some of the choices I made in terms of creating my character could have been changed, e.g: Using a pre-existing mesh and manipulating it to what I want.
  • More research of creating textures and more time into creating those textures.
  • Overall more research before I began the practical.
  • Clarifying my marking criteria earlier in the production of this project.

Final Thoughts

In the end, what I have created is what I set out to achieve, where there are some areas I wish I could have had more time in, or allocated time differently, I am happy with the final outcome. I put 110% effort into this project and I feel that it shows in my final product.

This entire project has helped me to see what it takes to become a 3D artist and what I need to do as a junior to excel into becoming a veteran of this work. I know there could be a lot of things that could have went better with this project as well as things that have went better than expected, I have learnt to have an eye for detail in anatomy and creation of assets as well creating organic models. 

At the end of the day I am pleased with the outcome of this project and it has only fuelled my desire to continue to create 3D characters and truly get better and better at this craft. 

- Jonathan Willetts.


Monday, 9 May 2016

May 9th - Final Renders

After some unity scene set up and sourcing an appropriate image to use as the backdrop, I have took several final renders of my model.

These renders will be accompanying my assignment hand in.


The next blog post will be a post mortem of this project with my thoughts and processes behind my workflow and methods.

-J.W

May 9th - Seam fixes and UV update

A problem that I had been facing with my textures was the horrible seams that were visible on the head of my model, when rendered in 3ds Max, they were not so visible however upon exporting the model to unity the seams were extremely visible and made the face of the model look ugly and poorly done as a result.


I have now fixed these issues, my model and all textures are now complete, the next step will be to export the model into unity, light the scene appropriately and collect renders of my model with an appropriate backdrop.


Fixing the seams

The main problem that was causing the seams to be visible was that my the UV's on my models face were not symmetrical, this meant, because my face texture was symmetrical, that the resulting texture was off on certain parts and this caused the seams to be noticed. 

The way I fixed this issue is by deleting half of the models head, then I used the symmetry modifier to re-create the other side of the head, this caused the UV's of the head to duplicate perfectly, all I had to do then was to horizontally flip the UV's and stitch them back together, resulting in a perfectly symmetrical UV layout for the head.

I discovered this method using by Brian T's workflow.

General model polish

I have also updated the model ever so slightly, fixing issues with vertexes around the fingers and eyes, not visible from far away but on a closer inspection these would have been noticeable if they were not fixed.

The fingers had extended vertexes making the tips of the fingers pointed and broken and the eyes had strange vertexes that led to nowhere, these have now all been fixed.


The last step, to put this model into unity and collect multiple renders is the final thing I will be doing, and this should be finished by tomorrow evening, resulting in one final last blog post about the model itself before the post mortem.

-J.W

Bibliography:

Brian T. (2005). Best way to mirror a UV Map for symmetry. Available: http://blenderartists.org/forum/showthread.php?35959-Best-way-to-mirror-a-UV-Map-for-symmetry. Last accessed 8th May 2016. 

Monday, 25 April 2016

April 25th update - general polish and issue fixing

This week I was able to export my model into Unity to get an idea of what the final product would look like and to see if there were any obvious faults in the textures, seems or other things of that nature.

Upon importing my model into Unity and taking a look at it the first thing I noticed was how over the top shiny my model was, my first thought was that this was due to the brightness of my specular map, upon turning it down my model is still extremely shiny but this seems to only be on the face, the clothes are not shiny as such, just have a mild glow of warmth to them.

Here is an example of the model in Unity:


And here is the full model rendered in Unity:


With the model imported into Unity I encountered a number of seeming issues with the hair as well as the textures on the shoes looking somewhat poor, I have fixed 1 of 3 issues with the hair and I fixed the shoes issue, 

I also dimmed the brightness of the Specular in hopes that my model would have not as much glow as before, this did have some effect but not enough, however I think if I dim the specular a touch more and change unity's lighting settings I should get the desired effect I want on the model.

Here is the new updated Diffuse: 


And here is the updated Specular:


As with this week, next week I will be focusing on Polishing my model even further and I will be baking an ambient occlusion map and uploading the results here.

-J.W


Monday, 18 April 2016

April 18th work update - Diffuse+Specular

This week has unfortunately not been a very productive week, with my other modules starting to take over the work flow, my final project has taken the back-seat for the moment, right now I have a work in progress specular map and a slightly more updated diffuse map.

Here is the updated diffuse:


It may not be very clear what I have changed as it mainly looks the same, however what I have done is change the skin colour of the arms to match the head so that there is not a contrast of colours and cleaned up the overlaying textures.

Here is the W.I.P specular: 


Very short update this week however I hope for this to change soon when I get my other modules under way and then my focus can go back to the final project taking the front-seat.

-J.W


Monday, 11 April 2016

April 11th - Diffuse continued

I have now added the face to the diffuse map and re-baked my normal maps, both the face and the normals have came out much better than I expected. Because of the length of time that it took to get the head texture looking right I was not able to polish up the other textures as I hoped to do, so that will fall to this week.

Here is how the diffuse map currently looks:


The head that I used is an actual photographed head of a Caucasian male, edited in Photoshop.
(Reference: David Vercher, Modelling and texturing head tutorials)

Here is how the new normal map is looking:


The new normal map has given the object much more noticeable creases and extra details around the head which is exactly what I was going for.

And finally here is a render of the model itself with the new normal and diffuse map:


The plan going forward for this week is as follows:

  • Polish the diffuse colour and add minor details where needed.
  • Create a new texture for the arms that match the faces colour range.
  • *If there is time* Start work in the Specular map.
-J.W

References:
David Vercher. (2016). Modeling & Texturing Head Tutorials (Autodesk Maya & Mudbox). Available: https://www.artstation.com/artwork/XGwQa. Last accessed 9th Apr 2016.

Thursday, 7 April 2016

Revising my Marking Criteria

With the end of the Final Project fast approaching I believe I should go over my marking criteria again to ensure that I and the markers of my work know how my final piece will be marked.

Here is my marking criteria as stated at the start of the year in my project proposal:

An exploration into the design and creation of a 3d character to be created in 3D Studio Max following the topic of animation.

For my final project I plan to design and create a 3d character that will be created as if they were to be a main protagonist in the video game Uncharted. This will involve looking into character design, 3d design, and most importantly, the creation of a fully designed 3d character in the appropriate 3d and sculpting software.

Marking criteria: Because I do not plan to rig or animate this model, all the criteria will be focused upon the modelling and texturing of said model.
            The quality of the models topology, does the topology of the model freely flow round the areas that are likely to be animated? E.G, mouth, eyes, stomach.
            The structure of the model, how well has the anatomy of the model been formed? The proportion, weight, and correct size for different anatomy.
            The UV unwrapping of the model, are the UV’s unwrapped in a professional manner? Are they unwrapped using sensible space, and being wielded appropriately?
            The quality of the textures, do the textures look realistic? Are they appropriate for the theme?
            The theme, how well does the model keep with the theme? E.G does the model match the Uncharted main protagonists look, explorer clothes, leather, t-shirt, boots, etc.
            The final render, the model must be imported into a game engine and rendered with appropriate lighting.

Most of the marking criteria I have made for my final project is rather clear and self explanatory, however I would like to draw attention to one of the points and re-address it and clarify what is meant by this section.

The theme, how well does the model keep with the theme? E.G does the model match the Uncharted main protagonists look, explorer clothes, leather, t-shirt, boots, etc.

I believe that because of the way I delivered the above sentence (does the model match the uncharted main protagonists look) that the markers of my work may think I am trying to re-create Nathan Drake from the Uncharted games, this is not true, I am creating a character that could replace Nathan Drake, a character that fits the theme of Uncharted and could potentially take the main character role in place of Nathan Drake. 

I state at the top of my project proposal "For my final project I plan to design and create a 3d character that will be created as if they were to be a main protagonist in the video game Uncharted." I stated this to justify my choices for the poly count and texture resolution I would be using, as if I were to create a background character, or an enemy that is not significant, the poly count and texture resolution would potentially be less.

Because of this mix-up I would like to change the wording of the marking criteria to show that my final product will not be Nathan Drake from the Uncharted series.

The marking criteria will now state:

The theme, how well does the model keep with the theme? E.G does the model fit into where the game is set (tomb raiders, explorers of dangerous places), explorer clothes, leather, t-shirt, boots, etc.

As such the new marking criteria is as follows:

Marking criteria: Because I do not plan to rig or animate this model, all the criteria will be focused upon the modelling and texturing of said model.
            The quality of the models topology, does the topology of the model freely flow round the areas that are likely to be animated? E.G, mouth, eyes, stomach.
            The structure of the model, how well has the anatomy of the model been formed? The proportion, weight, and correct size for different anatomy.
            The UV unwrapping of the model, are the UV’s unwrapped in a professional manner? Are they unwrapped using sensible space, and being wielded appropriately?
            The quality of the textures, do the textures look realistic? Are they appropriate for the theme?
            The theme, how well does the model keep with the theme? E.G does the model fit into where the game is set (tomb raiders, explorers of dangerous places), explorer clothes, leather, t-shirt, boots, etc.
            The final render, the model must be imported into a game engine and rendered with appropriate lighting.

I hope this clears up any confusion about what I was making in my final product.

-J.W

Tuesday, 5 April 2016

April 5th - Diffuse update

My diffuse map is now around 90% complete, the only thing left to actually create is the texture for the head of my model, after that is complete I am going to spend the rest of this week polishing up the textures in general. I am also going to re-bake my normal map as I believe I can achieve a higher quality normal map than I have already if I bake it using appropriate lighting and spacing. 

Here is what my diffuse colour looks currently:


And here is how my model looks when rendered:


As I stated at the start of this post, this week I shall be:

  • Starting and finishing the head textures
  • Polishing up the textures adding minor details.
  • Re-bake my normal map
-J.W

Monday, 28 March 2016

March 28th - Normals baked and diffuse colour in progress

So last week I had been working on baking the normal maps and I also got to start on creating my diffuse colour map.

Early on I ran into some problems while baking the normal maps, my first attempt resulted in some extremely odd looking normals, areas from the high poly were projecting into the wrong places on the low poly, and some were even on the back of the model while they were meant to be on the front. I also got some painfully jagged edges from my first projection which just looked horrible on the model when rendered.

Here are a couple of renders of what the model and Normal map looked like:


As you can see from the images above, this was not good, I ran through different fixes for this problem and came up with this: moving the model pieces so that the projection cage of the model did not collide with other parts of the model.

Here is what the model and cage looked like after I moved about the separate pieces:


After doing this and re-projecting my normals it gave me a much better normal map as a result.

Here is the second normal map I rendered:


And this is the result I got when rendering my model in 3ds max:


Diffuse Map

I had some time last week to begin work on my Diffuse colour map, so far I have laid out the Uv's and started working on the belt and the gun holster, I have also placed a "skin colour" over the face and arms and will add more detail to these in the coming weeks.

Here is what my Diffuse map currently looks like rendered on the model and in Photoshop:


In the coming weeks I shall focus on completing my Diffuse colour map, I also plan to do a specular map and bake an ambient occlusion map for my model as well.

-J.W


Sunday, 20 March 2016

March 20th update - UV unwrapping complete.

First of all I would like to apologise for not blogging last week, I had an assignment due in and I just didn't have the time spare to update here, however with that out the way I can safely say that I am well on my way with this project.

I have now finished UV unwrapping the retopologized model so all that's left is to bake the normals from the high poly to the retopologized one and start making the textures.

Here is how I have laid out my UV's:


I made sure to give the face the most space as I want that to have a high level of detail, followed by the shirt and trousers, then arms, belt, boots and finally gun holster.

During the unrwapping process I did run into one problem, the pelt mapping of the face, when I was pelt mapping the pelt connected itself to the outside of the face as well as the eye sockets, this caused the pelt to try and pull the rest of the uvs for the face through the eye sockets responding in some pretty horrifying looking UV's. 


After some brief research I found my solution, using the loop tool in max I could cap off the eye sockets making the pelt no longer target them when stretching out the UV's, this worked, and resulted in the nicely pelted and relaxed Uv's for the face you can see below.


When I start to create my textures I am going to use a 1024/1024 texture resolution, from my research in my initial blog posts that listed the poly count of several main characters of last generations consoles, 1024/1024 seems to be a good resolution to get the quality out of my textures, 2048/2048, to me, seems like it would be over-kill and not needed for this model. 

Through the remaining weeks of this final project I will be focusing on texture creation, each week I will give a brief update of how they are coming along and how they currently look on the model.

-J.W

Bibliography:

North Pixel. (2012). Pelt Unwraping a Face in 3Ds Max. Available: https://www.youtube.com/watch?v=3w-kEukP6wI. Last accessed 18th Mar 2016.

Jonathan Willetts. (2015). 3D Modelling & Poly Count. Available: http://jwillettsdissertation.blogspot.co.uk/2015/10/3d-modelling-poly-count.html. Last accessed 18th Mar 2016.


Sunday, 6 March 2016

Re-meshing, retopology ready for animation.

So good news and bad news this week, bad news first, I have not completed everything that i planned to do, I wanted to have the retopology finished, the UV's unwrapped and the normals baked, however that has not happened, I ran into some trouble during the retopology phase which set me back a fair bit. my initial thought was that I could leave all the retopology up to Zbrushes own bit of software called Z-Remesher, however what I tried this on the entire model it did not work as planned, after setting out the guidelines for how I wanted the topology to flow and how many polys I wanted the software to get as close as possible to, Z-Remesher decided to ignore all this information and do what it wanted, resulting in a over budget poly count and terrible topology for animation.

Onwards to the good news however, my saving grace was in Scott Spencer's Zbrush Digital Sculpting, during Chapter 8 Scott Spencer defines why retopology is so important during the modelling pipeline and goes on to talk about Zbrushes retopology tools, the one he goes into most detail about and uses to retopologize his model, is the system that uses Zspheres to define faces one vertex at a time.

This method was the method that I decided to use when retopologizing the face, and I will continue to use it for the arms and hands as well, I found that using this method was a much more controlled and manual intensive way of retopologizing your model, however I found this to give the best results when it comes to defining your topology.

Here is a render of my model during the retopology phase:


As you can see with the above image I have even topology flow around the eyes and mouth to allow even distribution when animation occurs. 

Here is the model after I had finished the retopology process: 


Head Poly Count - 2410

Due to me setting out the topology guides using Zspheres, you can see that the model has a nice flow of even topology around the eyes and mouth allowing for high quality animation.

Here are the other objects that I currently have retopologized:


Poly Count - 336


Poly Count - 1956


Poly Count - 1085

The T-shirt and Trousers were both retopologized using Z-Remesher which is why the flow of topology is off, I plan to set out the faces in a more animation friendly flow when i export the model to 3DSMax in the coming week. 

My plan for next week is as follows - Finish the remaining retopologizing (Boots and arms), Unwrap the UV's and bake the normals. I will also redo my timeline for this project as I have now fallen behind by 2 weeks due to these unforeseen circumstances.  

-J.W

Bibliography:

Scott Spencer. (2010). Remeshing. In: Scott, S, Eric, K and Paul, G.Zbrush Digital Sculpting, Human Anatomy. Canada: Wiley Publishing Inc. p266-279.

Sunday, 28 February 2016

Clothes sculpt continued

So this week I have been able to complete the clothes and accessories for my character, the clothes and accessories that the character is wearing are as follows: T-Shirt, Trousers, Boots, Belt and gun holsters.

This is what the high poly model looks like as of now:


Now that my model is complete I can move on to retopologizing the high poly model into a low poly, unwrapping the low poly's UV's and projecting normal maps from the high poly model to the low poly. 

I plan to have the retopologizing, UV's unwrapped and the normals baked and mapped by the end of next week, it is a lot to get done but I feel that I should be able to have it done. 

-J.W


Sunday, 21 February 2016

Starting to sculpt clothes

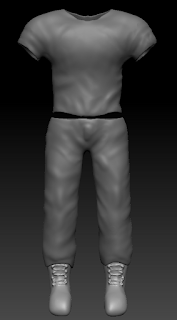
Now that I am happy with the look of my model, I have begun working on clothes for him, so far I have the T-shirt, trousers, and boots modelled, however they are still not at the level of detail I want, so over the next week I will be fine tuning the detail as well as creating any accessories I feel the character needs, such as a gun holster over his chest or a belt with holsters for water bottles, etc.

So here are a couple of renders of my models clothes currently:


As you can see in the image above, I have been adding subtle creases to add a more natural look to the T-shirt.


The same has been done with the trousers.


During my sculpt of the boots I discovered a new tool called the Curve Tube tool. 

This tool was extremely helpful in creating the laces for the boots, I plan to use this tool more during my final project to help create laces and loops with ease. 


Next week I plan to finish up the detail on the boots and start creating and finish the belt and gun holster ready to be retopologized the week after.

-J.W

Monday, 15 February 2016

Post presentation

So its been a week since my presentation, I have been using this week as a reading week, mainly to do some extra research into how a 3D character artists pipeline works and to take a look at some professional 3D character artists portfolios, this was due to my feedback from the presentation.

The feedback from the presentation mainly consisted of that I have not done enough research into how a 3D character artists pipeline flows, which I did admit to during the presentation. And that the lecturers are worried that because not enough research has been done I will not get to where I want to be at the end of the project.

After researching the 3D character artist pipeline and looking at professional character artist blogs I am confident that I can still finish what I set out to achieve.

3D Artist Pipeline

I have been looking at a number of 3D forums and professional websites that detail the ins and outs of their specific pipeline. 

Almost all of the company specific pipelines that I have looked at involve concept, modeling a high poly, retopologizing into a low poly, unwrapping and normal mapping and finally texturing. There are other steps, such rigging, skinning and animation however this does not apply to my final project so I do not need to worry about that during this time. 

During my research I found a very helpful table that outlines how the pipeline has changed through the years, this table explains very briefly how a model is made during today's standards, and luckily enough, while not actually knowing about this before hand, I have been following the third method the whole time. 


I am currently in the process of making clothes for my character which is at the very end of the first step. After that I will be retopologizing the high poly into a low poly model ready to be unwrapped and normal mapped.

My Project Timeline

Currently I do not believe I need to re iterate my timeline, as after looking at it again I am confident I can keep to what I have set each week on top of that I am up to date with the timeline already.


So after reviewing my feedback from the presentation and looking at my timeline and researching how the pipeline works in the industry I am confident that I am able to keep to my timeline and complete my final project before the submission date.

Looking at my timeline you can see that this week I will be starting to model the clothes of my model and getting them to a high quality before moving on to retopologizing.

-J.W

Bibliography

Patricia Waterman. (2014). Trends in the 3D Art Production Pipeline for Games 2014. Available: https://watermanp.wordpress.com/trends-in-the-3d-art-production-pipeline-2014/. Last accessed 15th Feb 2016.

Saturday, 6 February 2016

Model update - Something bugged me

Something was bugging me about my model, looking at it from a distance it looked extremely disproportionate, the chest was too long, and the stomach too short, he didn't have a visible neck, the shoulders were bulky, it just didn't sit right with me. I decided to re-read a couple of chapters from Zbrush Digital Sculpting, Human Anatomy by Scott Spencer, and realised something, I was not following the 8 head canon. 

The 8 head canon is a sort of guide to help make your drawings/sculpts as proportionate as possible, the idea behind it is to make your drawing/model as big as 8 of your characters heads, for example:

Taken from (Scott Spencer (2010). Zbrush Digital Sculpting, Human Anatomy. Canada: Wiley Publishing Inc. 209)


Upon discovering this information I revisited my model and made some adjustments which I feel has given my model a more natural appearance. My model is sitting in between the 7th head mark, as I felt that my model would be too tall if I were to go the full length.

Here is my model before adjusting his proportions:


And here is my model after the adjustments:


As you can see, the very tiny adjustment to his scale has made a huge improvement to how natural he looks.

Here is one last image with the 8 head canon guidelines applied:


With this information to hand, and my model looking a lot better in terms of proportion size, I will be happily creating my presentation ready for Monday.

-J.W

Bibliography - (Scott Spencer (2010). Zbrush Digital Sculpting, Human Anatomy. Canada: Wiley Publishing Inc. 209)